
Search the knowledge base, browse our resources, and visit our Community Forum for more detailed information
Last updated: 15 Feb 2022
Simple step-by-step process to export and upload your data as a shapefile into GIS software, such as ArcMap.
There are multiple ways to import location-based data collected through KoboToolbox into GIS software. This article will outline a recommended procedure to download data from KoboToolbox as a CSV file and upload it into ArcMap as a shapefile. While this example uses ArcMap, the process is similar to those in other geospatial softwares, including QGIS (free).
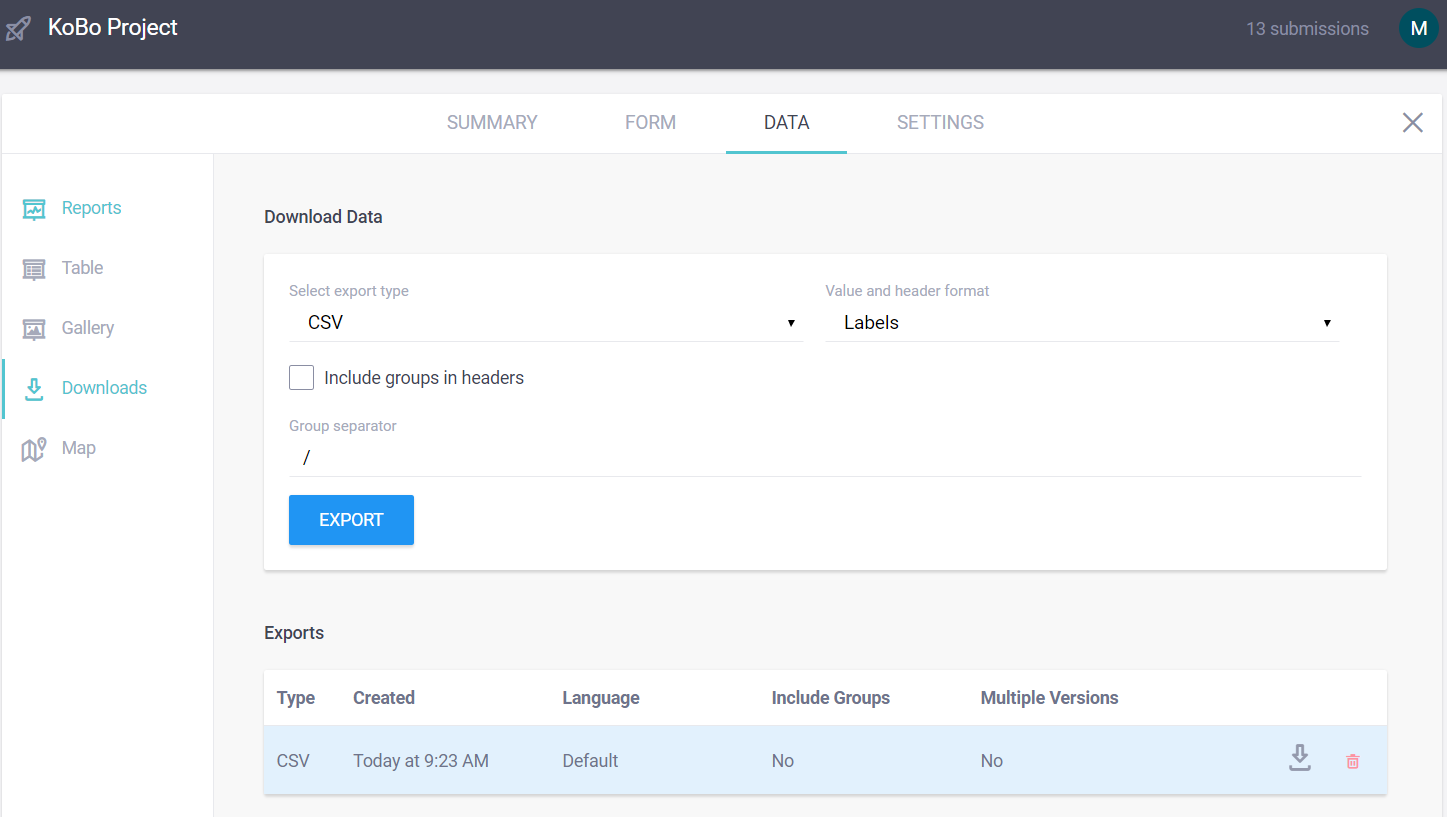
In the Downloads tab of your project page in KoboToolbox, export and download your data as a CSV file.
Note: You can edit the data set once its in the GIS software, however it may be easier to first edit in Excel, or similar program. In Excel, use the Text to Columns. function to split your CSV data into individual cells.
Open a new or existing project in ArcMap, go to Add Data, and then link the folder where your CSV file is saved on your computer.

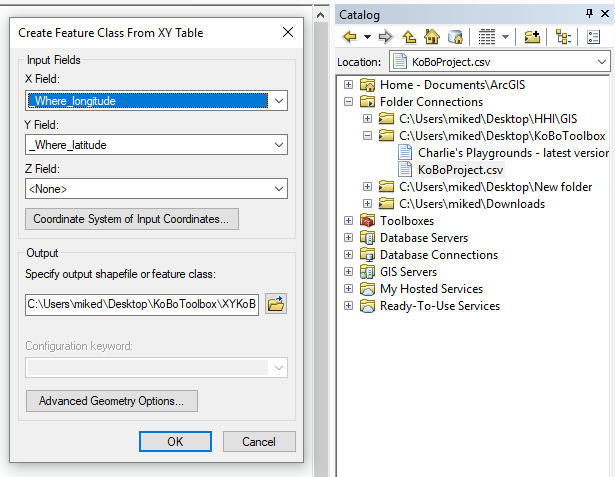
Open the Catalog window and click on Folder Connections. Find your CSV file, right click it, then select Create Feature Class > From XY Table.
In the modal, click the X Field drop down and chose your GPS question_Longitude option. Also, be sure to choose your Coordinate System of Input Coordinates…(WGS 1984 is a good one, if you’re not using one already) and make sure your Output is set to the appropriate folder, then click OK.
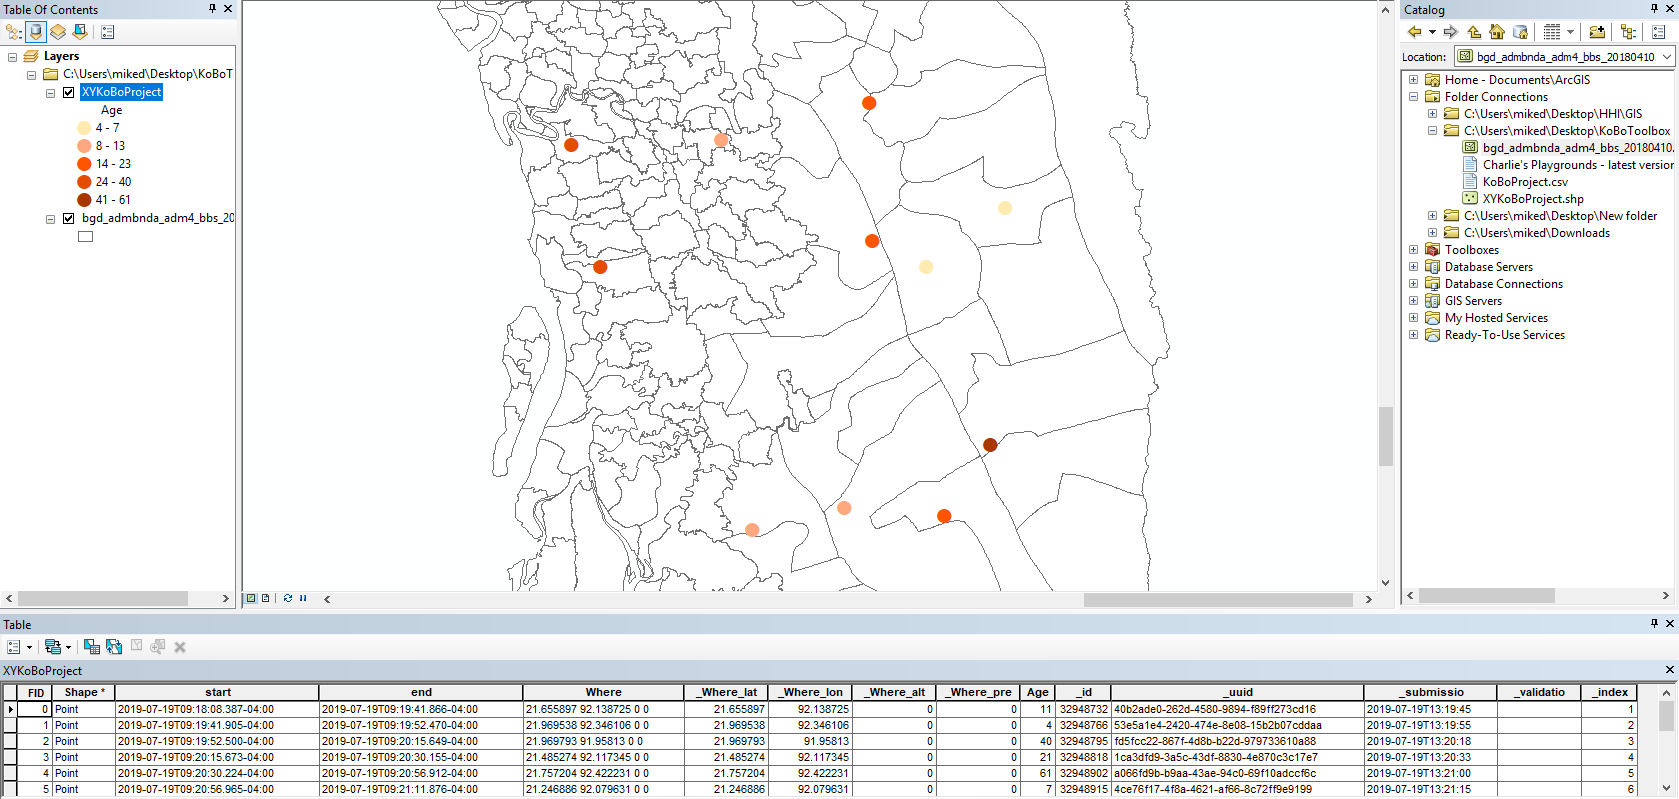
Back in the Catalog window, click and drag your new shapefile into either the Data View window or Table of Contents.
You should now see your points on the screen and if you open the Attributes Table, you’ll see all of the associated data with each point. From this point, you can now visualize and run various spatial analyses with your data.
Did you find what you were looking for? Was the information clear? Was anything missing?
Share your feedback to help us improve this article!